Find out in four easy steps.
Versatility, convenience and a smarter way of guaranteeing food safety - these are just some of the benefits of integrating PREPsafe in one’s businesses.
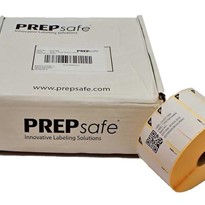
Firstly, you will need a printer and labels, these are available on www.prepsafe.com.au. Once ordered, the PREPsafe team will email you instructions and details to log in to your PREPsafe app web server, which will house all the information about your restaurant's inventory.
After logging in to www.prepsafeapp.com, you will find the ‘Administration’ button that drops down revealing a list of functions you can manage at a company level. These functions include Regions, Stores, Categories, and items as well as Custom content and more - all presented in an easy-to-use grid format.
1. Create Categories
The first thing to do is add your item ‘Categories’. These are groups (i.e. Vegetables, Meat, Sauces) that you will then add your items to. You can also arrange the Order that the categories will appear on your kitchen device based on a simple numbering system. This is especially helpful as categories more frequently used can be ordered to display first.
2. Upload and customise your inventory
Next up is the ‘Items’ page, where you will add the specific ingredients your restaurants are using to the categories you have just created. Here you will also specify the Shelf life and Defrost times to be calculated by Preppy App before printing.
You can even set items to expire at the end of the day or even a user-specified time entered before printing by clicking a checkbox. When creating items, you can also add thumbnail images of the items themselves making the app extremely visual for kitchen staff. PREPsafe has a database of about 400 images of items you will likely have in your restaurant and the system also allows for restaurants to upload their own images.
Most food businesses already have a working shelf life chart that the item information will be entered from. PREPsafe has also catered nicely to restaurants with particularly large inventories to avoid manually uploading each item into the database. The webserver has a “Mass Upload” function where you can populate and upload an excel sheet with all your items and their shelf life specifications directly to the webserver in seconds.
3. Add Store accounts
After setting up your Categories and Items you are now ready to add your stores, Simply go to ‘Stores’ and create as many store accounts as you need for your business. Each store will have a username and password to log into the application and you can even Mass Upload thousands of stores from an excel sheet if you need.
4. Store Kitchen setup
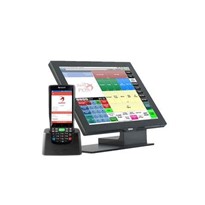
Grab your tablet or phone and download Preppy App from Google Play or the Apple Store then log-in with your store account details. Tap on the Settings button and with your printer turned on and ready to go, and select it from the Printers list. The last thing you need to do is scan the app licence code located on the lid of your PREPsafe labels box and you are all set to go and print some labels.
Other features of Preppy app
PREPsafe prides itself on Preppy Apps' ability to print labels that are also customisable. In the ‘Custom Labels’ section, you can upload your brand’s personalised labels to reprint from the app on demand.
These labels could be nutrition or consumption labels, customer pickup or thank you labels, or even price and barcode labels anything you imagine can be created and added to your database. A free one-on-one tutorial screen share session is offered to all new customers enabling you to learn how to get the most out of this unique function.
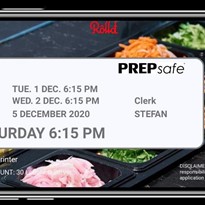
PREPsafe promotes accountability and elevated food safety by having a Clerks input for every kitchen label printed. Entering and managing clerks is easily done directly through the Application at the store level, Clerks can even add a fun selfie right from the device's camera that will appear on their assigned clerk button.




-205x205.jpg)
-205x205.jpg)
-205x205.jpg)


