-720x400.jpg)
-720x400.jpg)
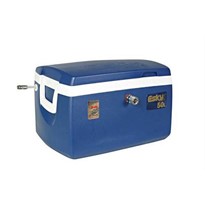
Keg coolers are far more specialized than small refrigerators, despite their appearance. A variety of businesses employ keg coolers to chill and serve draft beer. There are a variety of keg coolers available in a variety of sizes and types, including indoor and outdoor keg coolers. This article will educate you on the numerous varieties available so you can make an informed decision about which one is best for you.
What is a Keg Cooler?
A keg cooler makes it simple to maintain ice cold beer on tap, making serving your guests more efficient. Keg coolers are available in a variety of shapes and features to suit the demands of any business. Keg coolers can accommodate a variety of keg sizes and quantities, ensuring that your restaurant or bar's capacity requirements are met.
How Does a Keg Cooler Work?
Keg coolers are made up of a hollow interior cavity where the keg is stored, a normal latching or sealing door, and a dispensing tower on the top of the device. However, there's a lot more to them than meets the eye. Learning how to use a keg cooler is a crucial component of keeping your unit in good working order.
- Faucet Handle:Faucet handles are available as direct replacements or as unique improvements to your tower's cosmetic attractiveness. Some even have written surfaces, which are ideal for beer menus that change frequently.
- Faucet:Faucets are attached to the tap towers and are where the beer is dispensed. Multiple faucets can be added to each tower, hence the number of tap towers does not always match the number of faucets.
- Drip Tray: The drip tray is located at the foot of the tap tower, on top of the unit. When distributing beer, it neatly absorbs overflow or spills.
- Tap Tower:Beer moves from the keg to the tap tower, where it is nearly ready to be served. Tap towers are available in a variety of shapes and configurations, with varied numbers of faucets.
- Guard Rail:Guard rails are mounted on the keg cooler's top. This rail will keep your glasses from falling off if you chose to store them on top of the unit.
- CO2 Tank: Through the coupler, carbon dioxide enters the keg, allowing the gas to force beer up through the beer line and into the tap tower.
- Beer Line:The beer line connects to your coupler and transports beer from your keg up the tower and out the faucet.
- Coupler: The coupler is a valve that allows you to tap the keg.
- Regulator:The regulator, which is connected to the CO2 tank, allows you to vary the pressure or keep it constant.
- CO2 Line:This line links the regulator to the coupler and works with the CO2 tank to force beer via the beer line.
- Casters:On standalone systems, casters enable convenient movement.
- Keg:The keg is the container in which beer is stored and chilled in the keg cooler.
Most keg coolers do not include these pieces unless otherwise mentioned. The necessities, such as the CO2 tank, tap tower, coupler, and regulator, must be purchased individually.
How Long Does a Keg Last in a Keg Cooler?
Non-pasteurized beer can last up to 60 days if dispensed with CO2 at the correct temperature and pressure; pasteurized beer can last up to 120 days. On the top or side of the keg, several breweries print a freshness date.
Most craft breweries follow these temperature standards to guarantee that your beer is stored at the right temperature:
- Macro-brand beers (pale lagers, light beer): 1°C to 3°C
- Craft beers such as pale lagers, light ales: 5°C
- Craft beers such as standard ales, amber lager, dark lager, ciders: 8°C
- Craft beers such as high-alcohol or malty styles including an imperial stout, old ale, barleywine: 10°C to 13°C
Keg Cooler Types & Dimensions
Indoors Keg Coolers
Bars, pubs, and caterers who host indoor parties will benefit from indoor keg coolers. Because they should not be utilized in temperatures below 50 degrees or above 85 degrees, they are classified as indoor keg coolers. Take this into account while selecting the keg coolers that are best for you. Some units are freestanding, while others can be integrated into a countertop. Before you begin your search, keep in mind that there are three types of indoor keg coolers: single keg units, multiple keg units, and multi-purpose units. Following that, we'll go over the distinct characteristics of each category.
Single Keg Units
These are the smallest keg coolers available and, as a result, they hold the least amount of beer. Still, you might be surprised at just how many people one of these can serve. A single 1/2 barrel keg holds about 16 litres of beer. Single keg units are ideal for caterers looking for something that is both easy to operate and made to last. Many of these single keg devices are freestanding and cannot be integrated into a countertop because of their reduced capacity. Due to space constraints, you may need to keep the CO2 tank outside the unit, depending on the model.
Multiple Keg Units
Multiple keg units allow for various keg configurations, giving you more options and more beer! If you want something with a greater capacity, you'll probably want to put it into your bar rather than using it as a freestanding machine. However, if you want to move the machine around more readily, casters can be purchased. Extra tap towers are included in many keg variants for better serving efficiency. You can serve more than one type of draft beer with the extra towers, which are often tied to their own kegs. Depending on the model, multiple keg units may normally carry (2-5) 1/2 barrel kegs.
For more keg configurations, multiple keg units can handle sizes of kegs other than the standard 1/2 barrel, such as a 1/4 barrel or the less common 1/6 barrel. These smaller kegs are fantastic for sampling, but not so much for feeding a large group.
Units with several uses
Multi-purpose units give you the greatest amount of flexibility. Club top units, for example, have space to store bottles and cans in addition to your keg(s) through a top door. The club top units provide your bartenders or waitstaff with easy access to speed up the serving process. Six-packs or lesser amounts of beer, soda, or other canned beverages are typically stored in club tops. They can also be used to frost glasses so that your customers can enjoy a refreshing drink.
Outdoor Keg Coolers
Outdoor keg coolers are built to perform in temperatures that are much lower and higher than those found in conventional indoor environments. This range is 45-100 degrees for most models. Garages, unfinished basements, outdoor patios, and caterers working outdoor parties will all benefit from them. Keg container beer dispensers are an excellent alternative if you need something a little more portable! They're simple to use and maintain. To chill the beer, simply place the 1/2 barrel keg in the container and fill it with ice. The rest of the equipment functions similarly to a keg cooler, dispensing draft beer through a tap tower using CO2. Tailgating and outdoor parties will be a breeze with these. They're simple to clean once you're done.
How to Set Up a Keg Cooler
The process of setting up a keg cooler is quite straightforward, although it does involve a few steps:
- First, if your keg cooler came with casters, place them on the bottom of the container. Turn the machine over so that the casters are on the bottom.
- Remove the plug covering the opening with a screwdriver and attach the tap tower to the keg cooler. Pull the tubes from the tap tower through the hole and into the keg cooler's interior. Attach the tap tower to the keg cooler with screws, aligning the holes in the tower with the holes on the keg cooler.
- Attach the keg coolerto the railing. When aligned with the holes on the top of the cabinet, it should click into place.
- Screw the faucet into the faucet adapter at the front of the tap tower to complete the installation. The black handle should be screwed onto the faucet.
- Connect the keg cooler coupler to the beer line. Connect the beer line to the top of the coupler with a rubber washer in the hex nut, and secure the line with a hex nut wrench.
- Connect the CO2 gas line tube to the regulator after making sure the CO2 regulator shut off valve is closed. To guarantee that the tube is properly pressed into the regulator, use a screw clamp or pliers to ensure that it is firmly pushed into place. On the side of the coupler, connect the opposite end of the gas line tube to the hose barb. Push the tube firmly into place one more to ensure it is secure.
- Make sure the cylinder is closed before attaching the CO2 regulator. The inlet nut should be screwed into the cylinder valve and tightened using a wrench.
- Screw the coupler into the keg's locking neck, making that the coupler is in the closed position.
- Carefully install the CO2 holder in the cabinet and secure it to the keg cooler’s holder on the inside or outside. Double-check that the regulator is still visible. Turn the air tank's wheel to the "on" position, then turn the shutoff valve on the regulator to the "on" position.
- Set the regulator to the PSI level after calibrating it. By adjusting the pressure adjustment with a screwdriver, you can modify the PSI. Slowly adjust the pressure to your desired PSI, which should be between 10-15 PSI. After that, adjust the temperature to 36-40 degrees Fahrenheit.
- Close the keg cooler door and carefully lay the keg in the bottom of the cabinet. You'll be able to serve beer at this point!
How to Clean a Keg Cooler
It's critical to know how to clean keg cooler lines if you want your beer to look and taste as fresh as possible. This should be done every 2-3 weeks at the very least, and even more frequently in high-volume establishments. Make sure you're using the right chemicals to clean the keg cooler, and invest in a cleaning kit to make the procedure go as smoothly as possible.
- Remove the faucet, coupler, and any washers from the tap tower to get started. Allow these items to soak in a dish of warm water with cleanser, then scrub them clean with a brush.
- Wipe the outside of the keg cooler clean, removing any residue or beer puddles.
- Follow the packaging directions for making the beer line cleaner. Fill the bottle that came with the cleaning kit with this cleaner.
- Connect the cleaning bottle attachment to the faucet head and place the beer hose in a pail (where the faucet was previously removed). The cleaning solution should then be pumped through the lines. It's a good idea to flush the lines at least twice.
- Fill the bottle halfway with hot water and pump it through the lines at least twice more.
- Replace the washers, coupler, and faucet on the tap tower to reassemble your keg cooler. After you've double-checked that everything is safe and in position, tap the keg. Your keg cooler will be sanitized and ready to serve cold beer!